HTML Report Output
Based on K6’s default test reports, K6 itself can only output command-line reports without a graphical interface for test reports.
If we want to generate graphical test reports, we can use the third-party K6 HTML Report Exporter v2 plugin to generate HTML reports.
Here are the steps to use the K6 HTML Report Exporter v2 plugin to generate HTML reports:
-
- Import the K6 HTML Report Exporter v2 plugin in your test script
import { htmlReport } from "https://raw.githubusercontent.com/benc-uk/k6-reporter/main/dist/bundle.js";-
- Configure the K6 HTML Report Exporter v2 plugin in your test script
export function handleSummary(data) {
  return {
    "summary.html": htmlReport(data),
  };
}-
- Complete test script example
import { check } from 'k6';
import http from 'k6/http';
import { htmlReport } from "https://raw.githubusercontent.com/benc-uk/k6-reporter/main/dist/bundle.js";


export default function () {
  const res = http.get('https://httpbin.test.k6.io');
  check(res, {
    'HTTP response code is status 200': (r) => r.status === 200,
  });
}

export function handleSummary(data) {
  return {
    "summary.html": htmlReport(data),
  };
}-
- Run the test script with k6 to generate an HTML report named summary.html in the project root directory
-
- Open the summary.html report to view the HTML report.
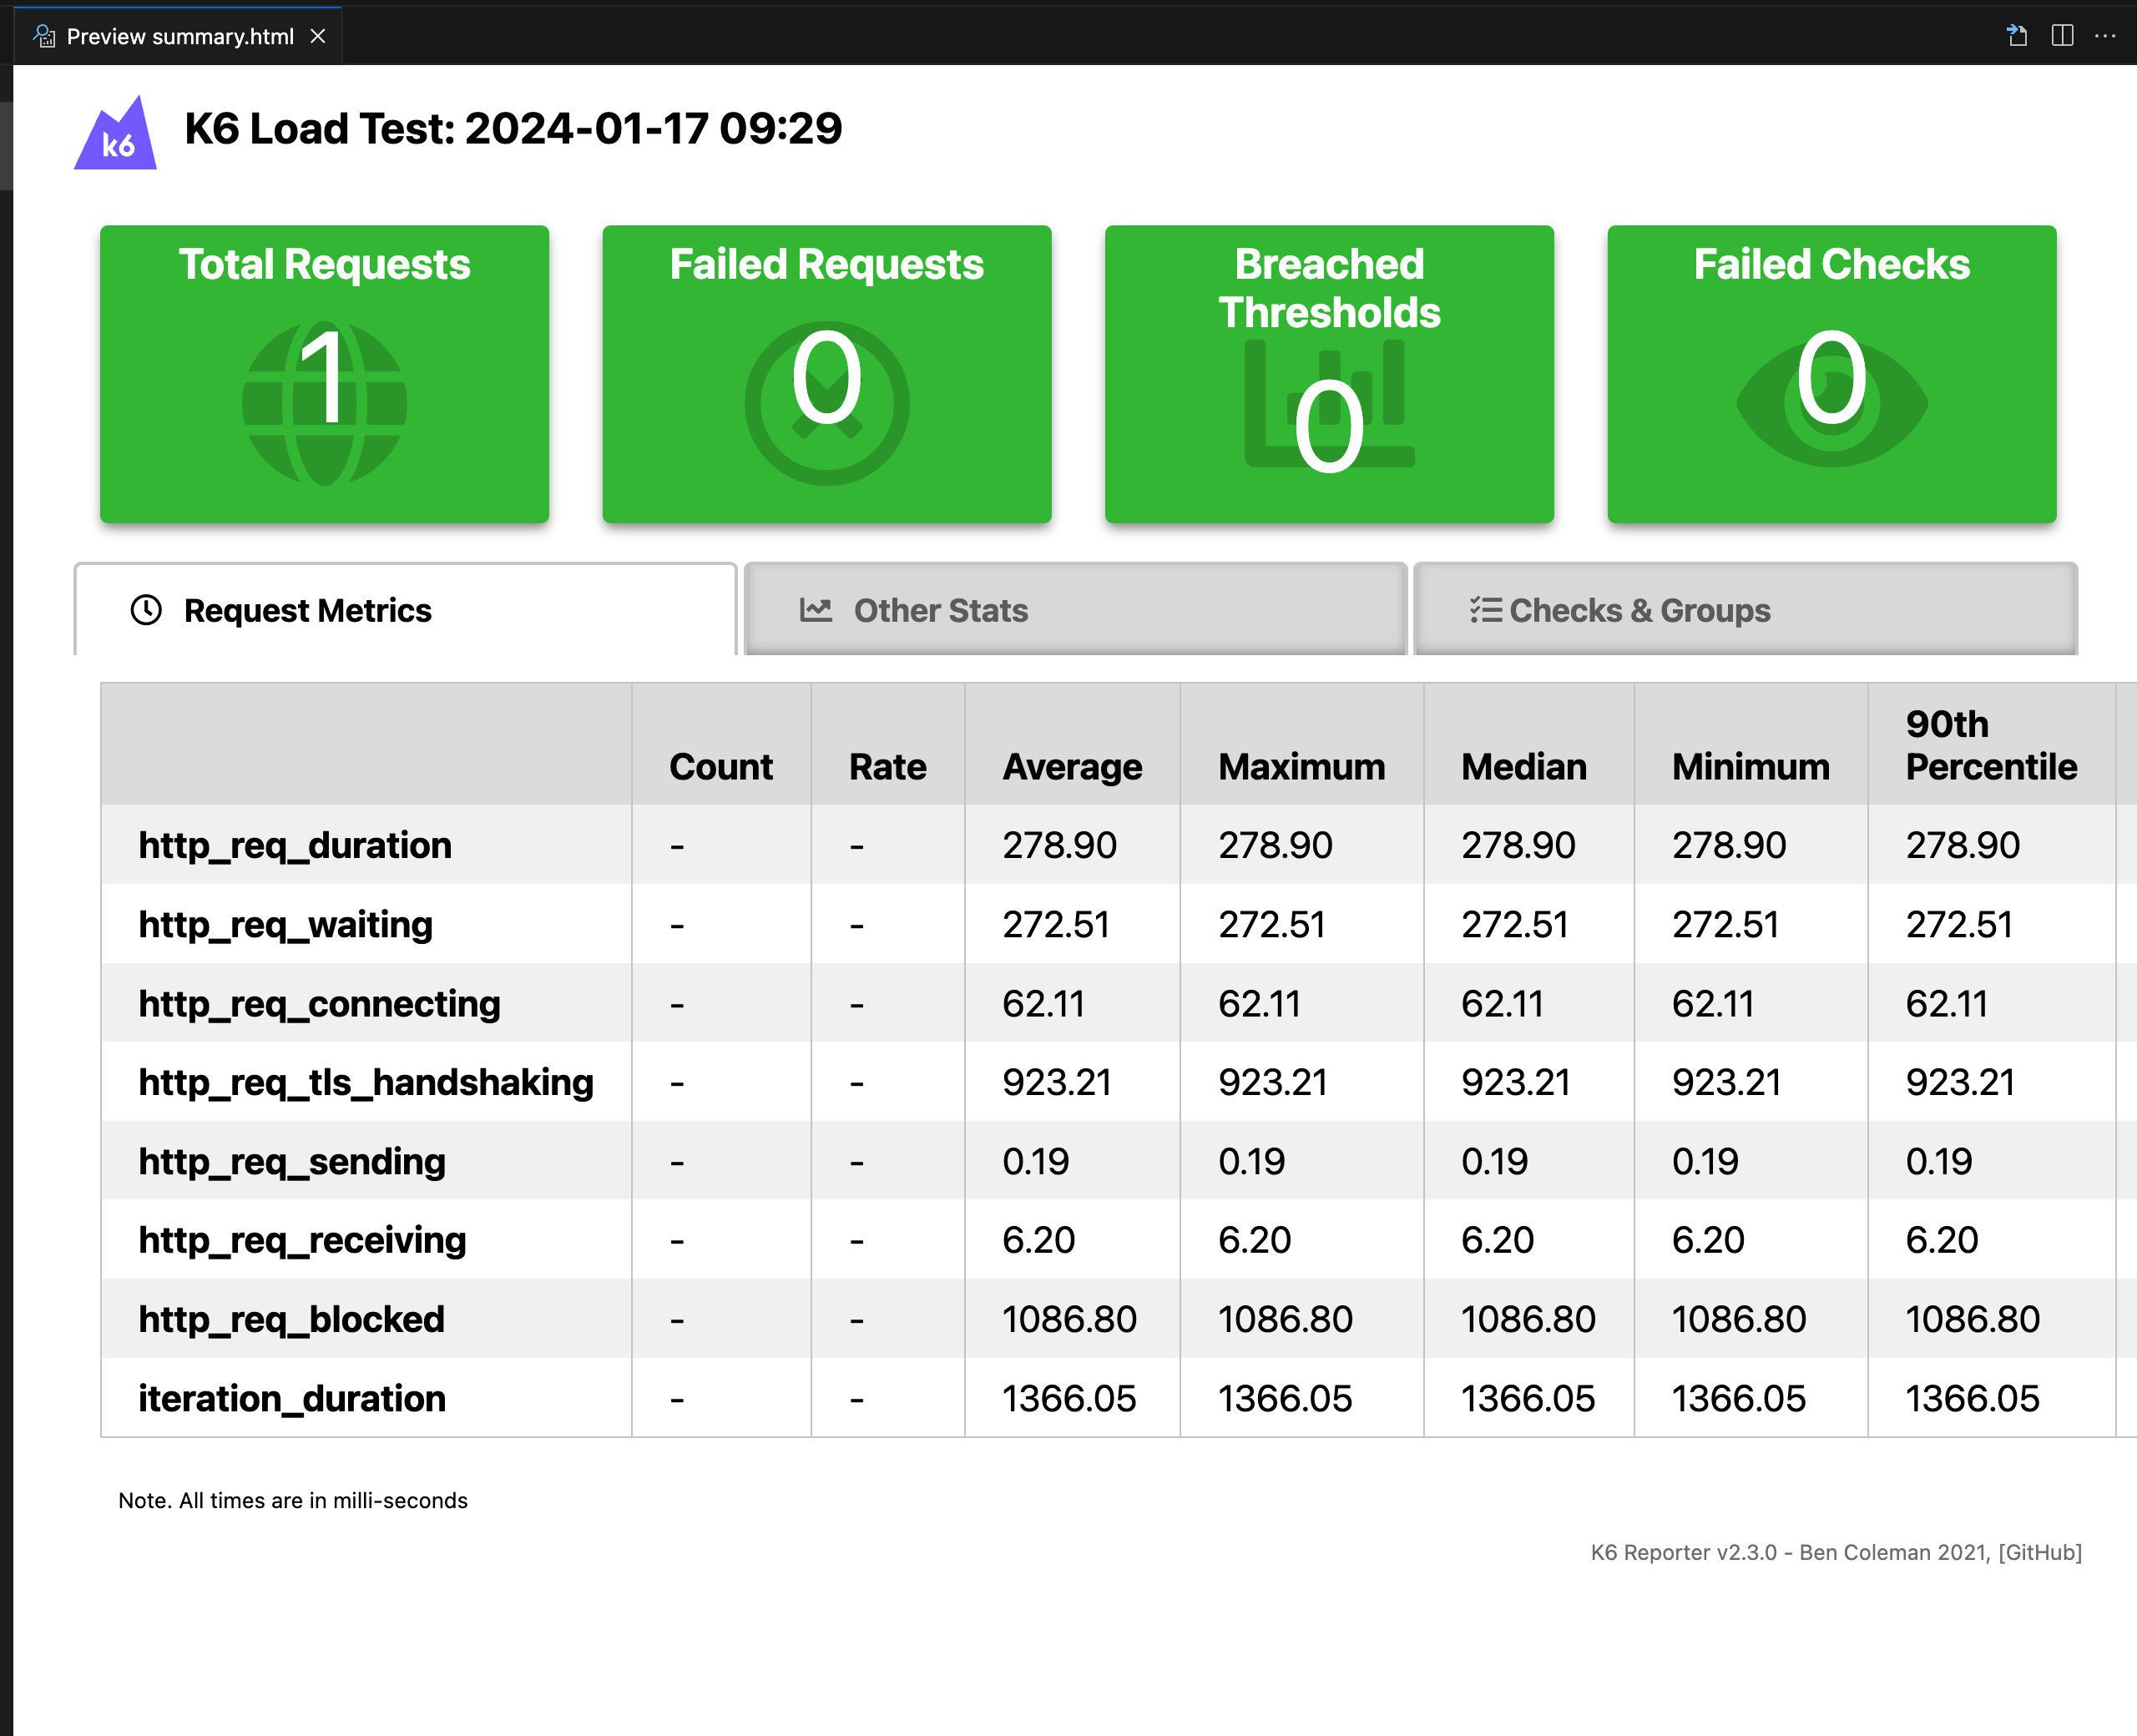
- Open the summary.html report to view the HTML report.
For more information about the K6 HTML Report Exporter v2 plugin, please refer to the official documentation https://github.com/benc-uk/k6-reporter[https://github.com/benc-uk/k6-reporter]
Continuous Integration
Integrating with GitHub Actions
Using GitHub Actions as an example, other CI tools are similar
-
Create .github/workflows directory: In your GitHub repository, create a directory named .github/workflows. This will be where GitHub Actions workflow files are stored.
-
Create workflow file: Create a YAML format workflow file in the .github/workflows directory, for example k6.yml.
-
Edit k6.yml file: Copy the following content into the file
name: K6 Performance Test
on: [push]
jobs:
  build:
    name: Run k6 test
    runs-on: ubuntu-latest
    steps:
      - name: Checkout
        uses: actions/checkout@v4
      - name: Run k6 local test
        uses: grafana/k6-action@v0.3.1
        with:
          filename: demo.js
flags: --vus 50 --duration 10s-
Commit code: Add the k6.yml file to the repository and commit.
-
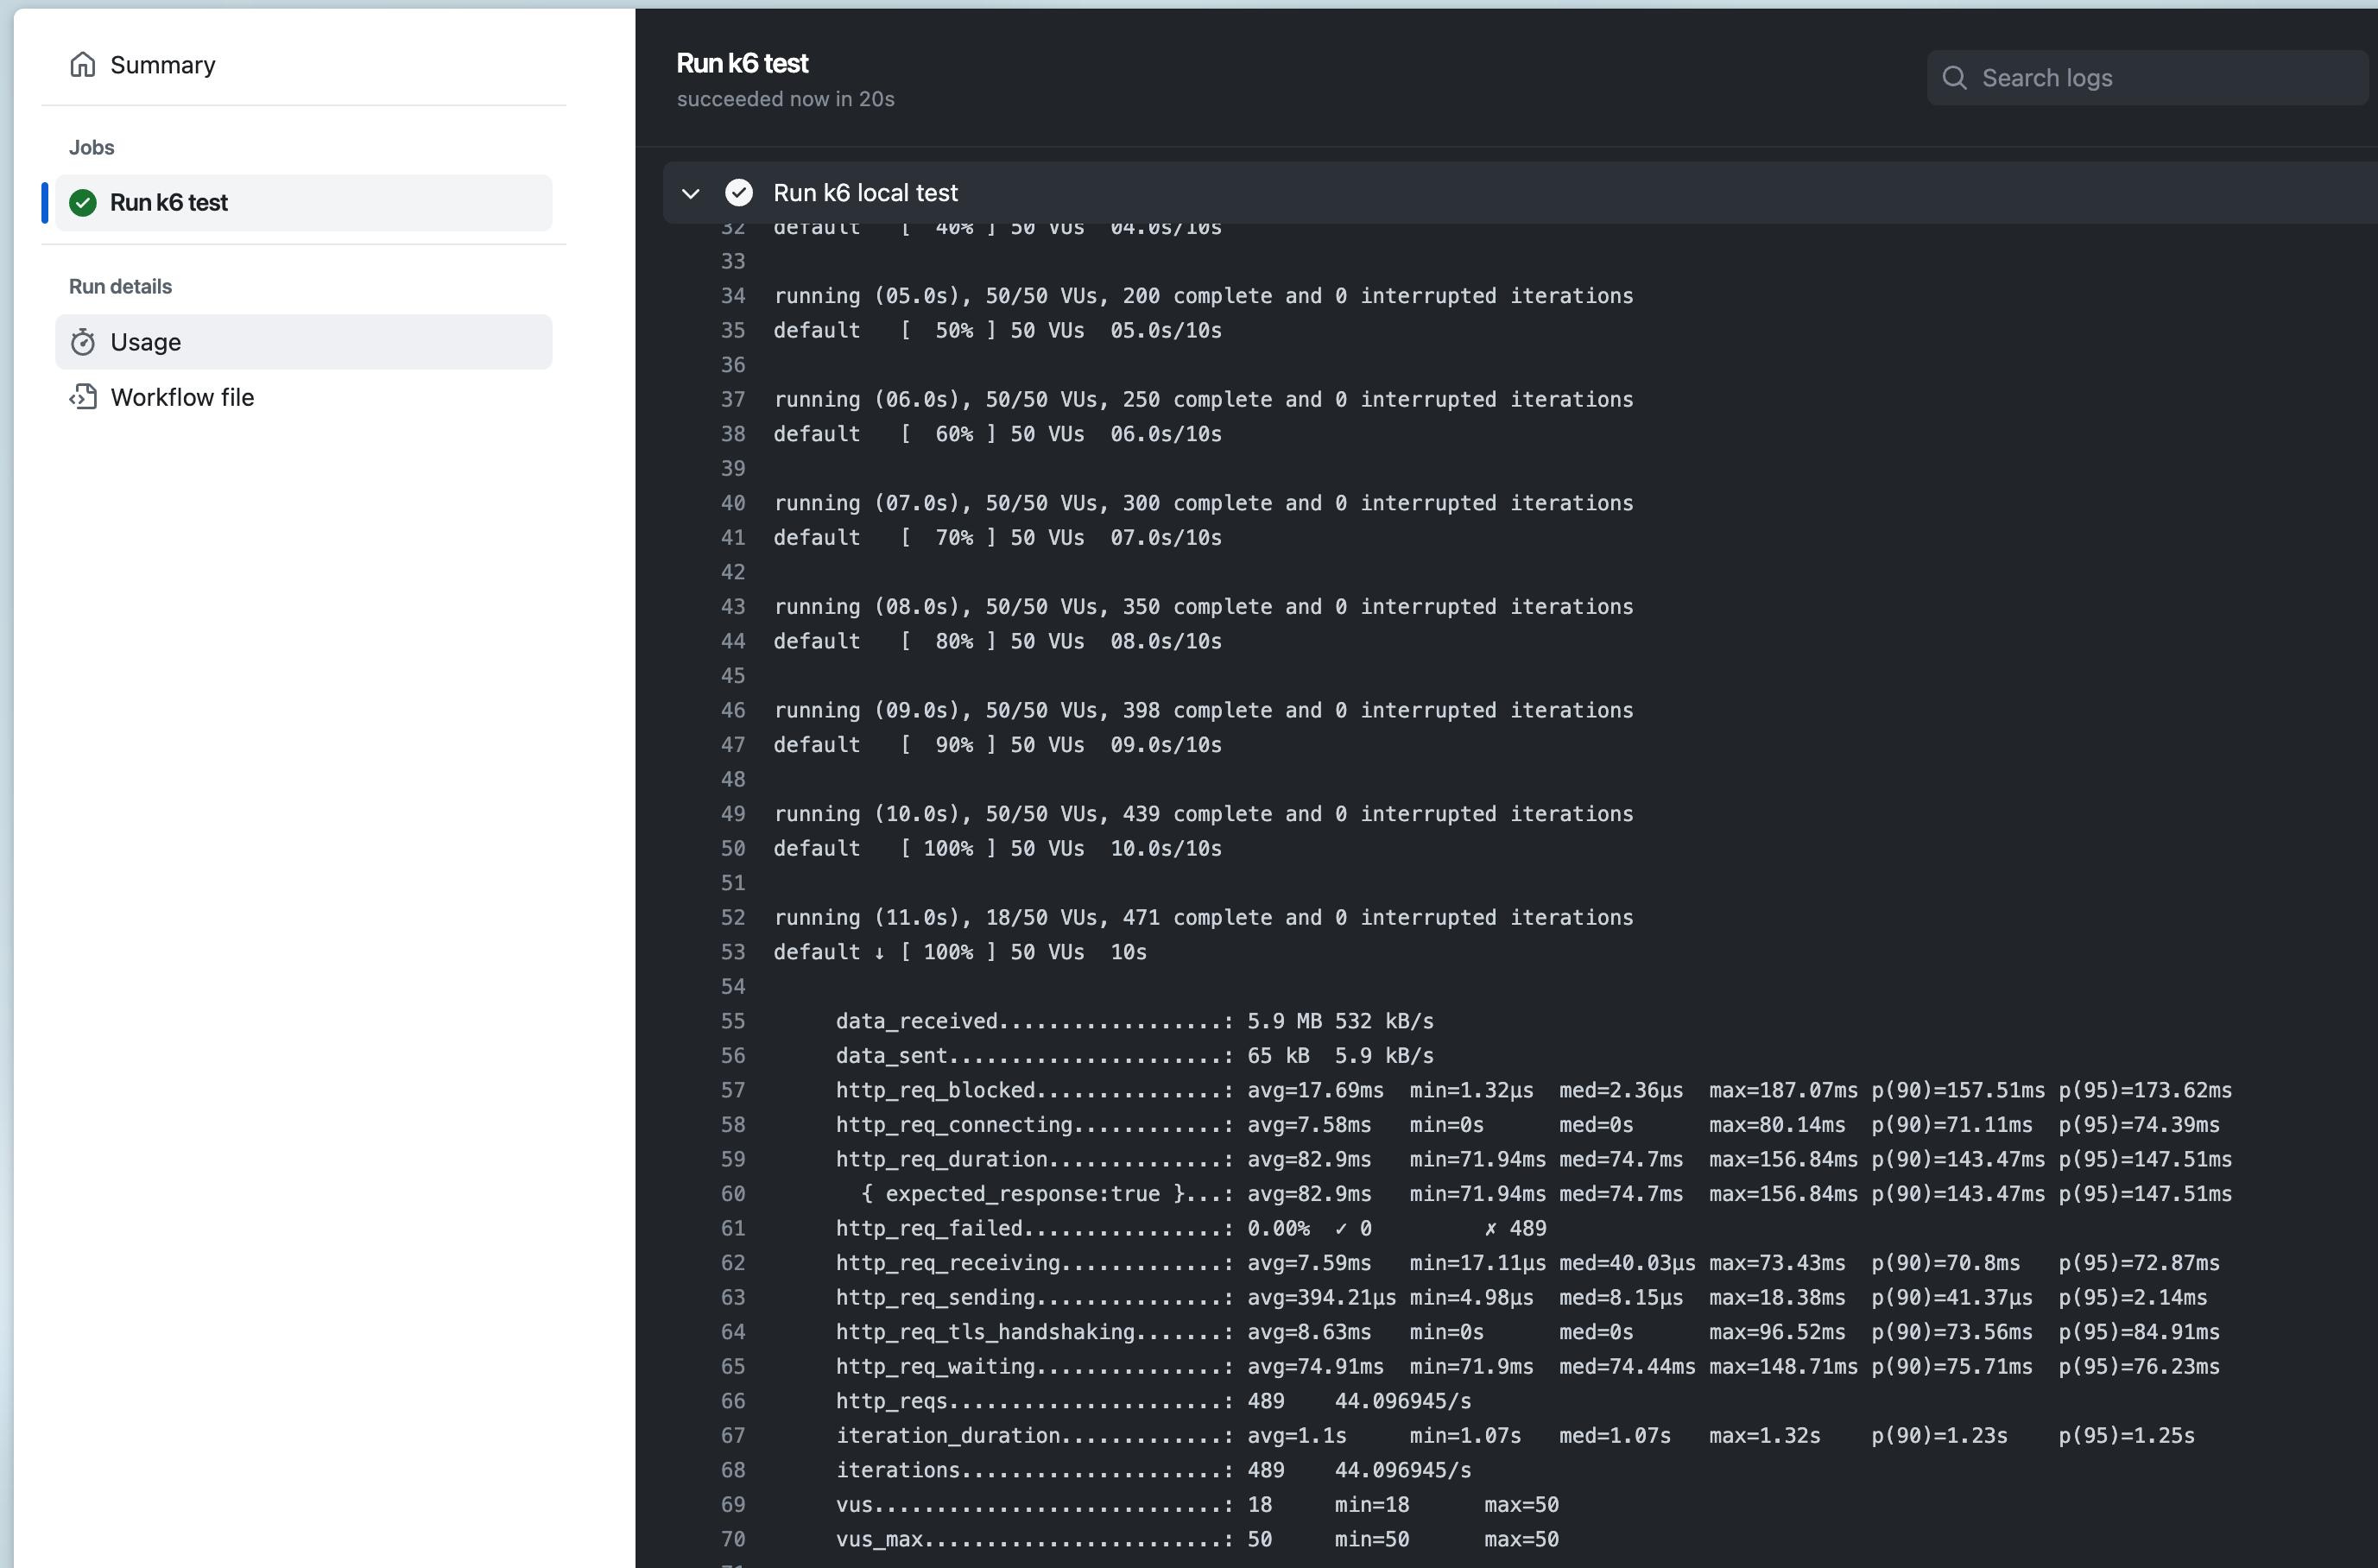
View test report: In GitHub, navigate to your repository. Click the Actions tab at the top, then click the K6 Performance Test workflow on the left. You should see the workflow running, wait for execution to complete, and you can view the results.
-
We can also output HTML reports through GitHub Actions, let’s adjust the k6.yml file
name: K6 Performance Test
on: [push]
jobs:
  build:
    name: Run k6 performance test
    runs-on: ubuntu-latest
    steps:
      - name: Checkout
        uses: actions/checkout@v4
      - name: Run k6 local test
        uses: grafana/k6-action@v0.3.1
        with:
          filename: demo.js
          flags: --vus 50 --duration 10s
      - name: Archive K6 performance test report
        uses: actions/upload-artifact@v3
        with:
          name: K6-performance-test-report
          path: summary.html
      - name: Upload K6 performance test report to GitHub
        uses: actions/upload-artifact@v3
        with:
          name: K6-performance-test-report
path: summary.html- Commit code: Add the k6.yml file to the repository and commit.
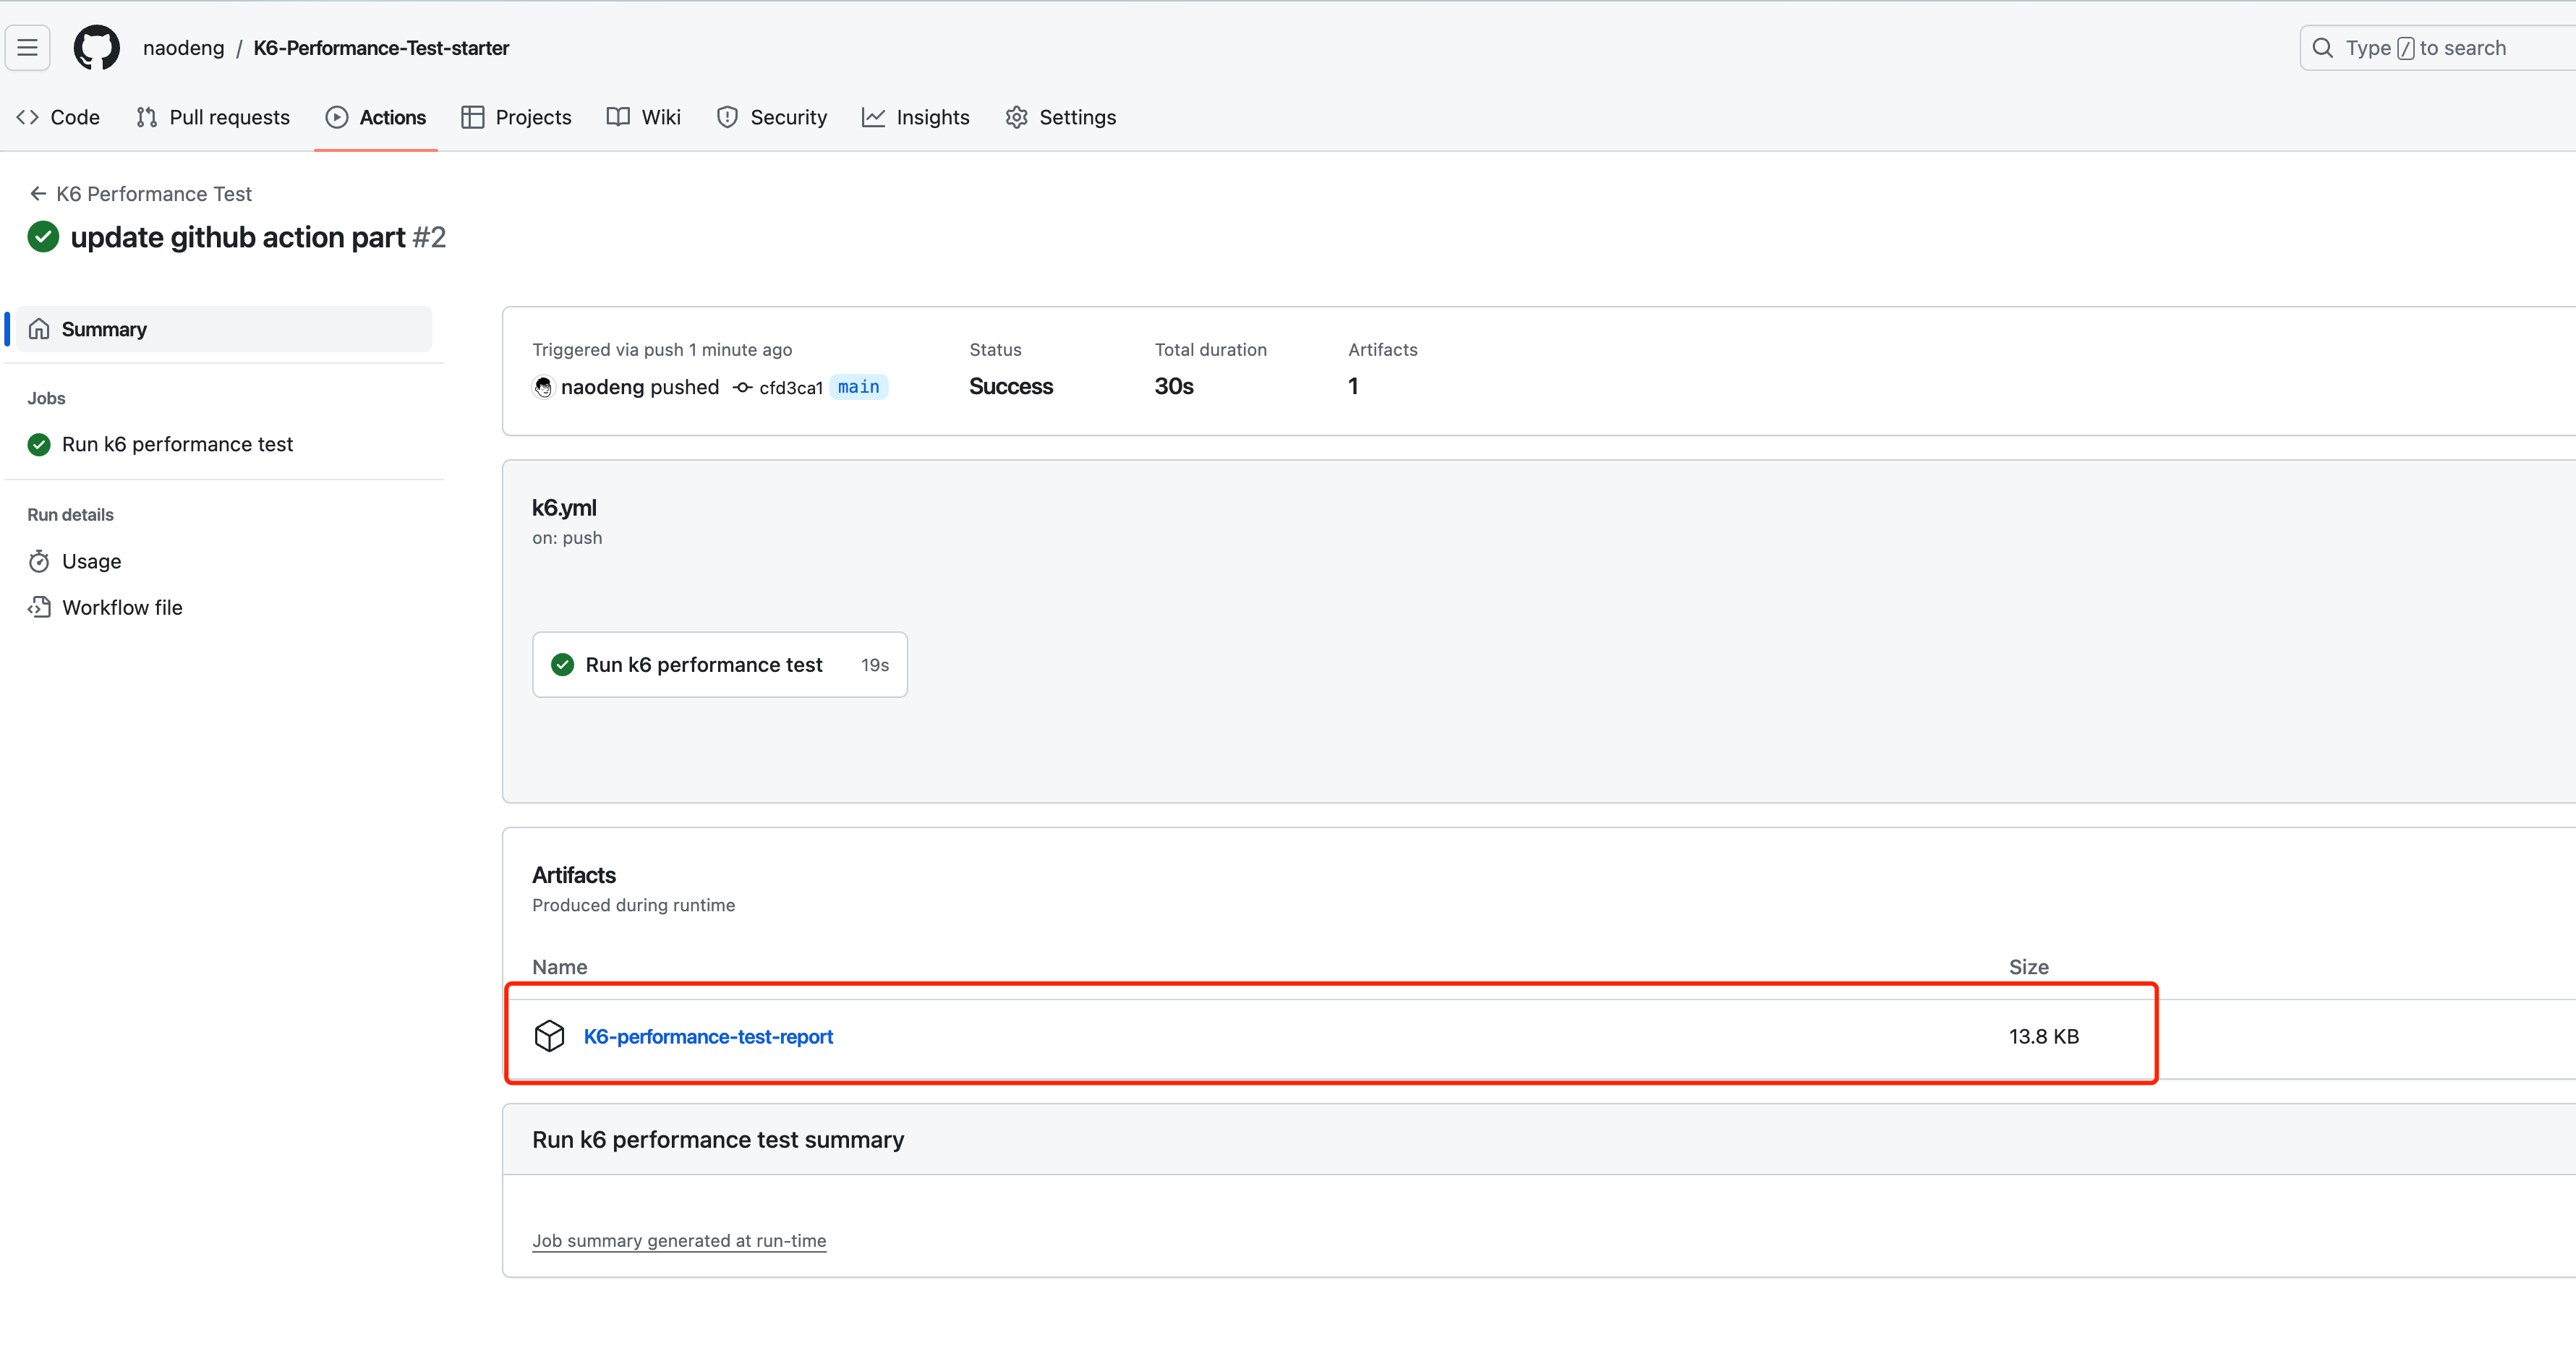
- View test report: In GitHub, navigate to your repository. Click the Actions tab at the top, then click the K6 Performance Test workflow on the left. You should see the workflow running, wait for execution to complete, and you can view the results and test report attachments.
Reference Documentation
Follow the WeChat official account “软件测试同学” for original QA technical articles.